7 Spectacular Fall Planted Flower Bulbs For Spring Blooming Fireworks
7 Spectacular Fall Planted Flower Bulbs to Plant for Spring Fireworks – An In-Depth Planting Guide.
Cold nights and frosty mornings are once again invading the beautiful vistas of the Central Oregon High Desert and time is quickly slipping away before the snow flies and the ground freezes.
Time to let go of summer
If you’re like me, your yard is your sanctuary, and I am always scheming new ways to enhance my little outdoor oasis, especially since the awesome summers always go by in a flash. So extending my growing season to get the most enjoyment out of my yard is one of my top priorities.
One of my favorite things to do is plant more bulbs! It’s so easy and in expensive to do, especially compared to the cost of what must garden perennial plants tend to cost.
Think about it like this: if you go to your garden variety box store and get a 2 quart perennial, like a daisy, you’re going to spend 5 bucks, for one plant!
I get it, I’ve bought plenty of daisies for my own yard because nothing matches that clean bright pop of white during mid-summer, but lets face it, that’s a lot of money to spend to populate a 5 x 10 planter area.
Another great advantage bulbs have over standard perennials is the rate at which they multiply.
Your daisy will double in size in 2 years or so, but the quantity of your bulbs will double every year, sometimes a little more depending on the variety.
In a previous article, I briefly mentioned a couple quick tips for how to plant bulbs, including plugging them into your lawn.
In this article I’m going to go more in depth into specific types of bulbs and planting instructions.
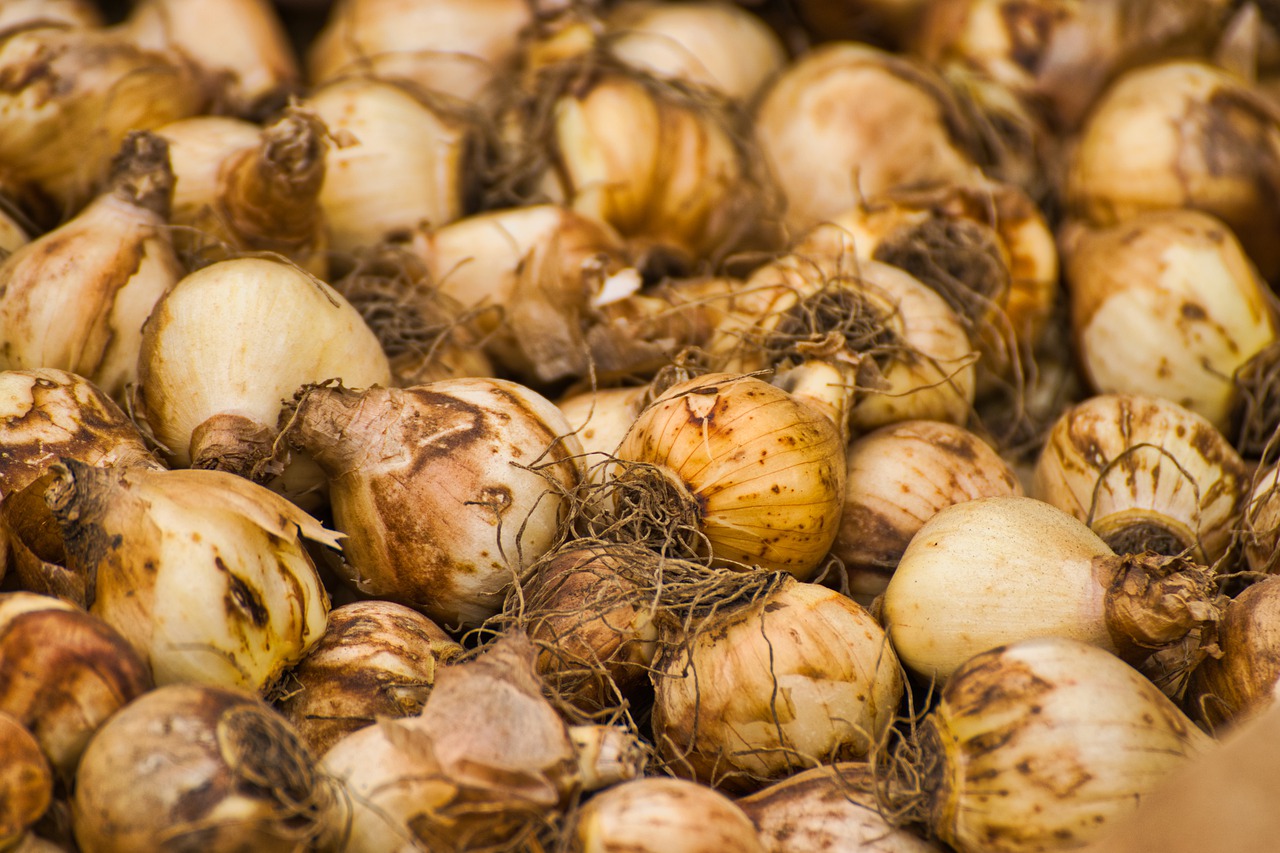
Tulip Bulbs
When To Plant (Most) Bulbs
If you are ordering online, its best to get your orders in early, like in August, especially if you want huge packs of bulbs for the best price. The large packs sell out first (because they are such a good value), so order early, they normally won’t ship the bulbs until late summer / early fall in time for planting.
Ideally, you want to get these in the ground in October. The soil is easier to work with unlike November and December when it can pretty much be frozen solid.
That said, there really is a cut off time for planting, I really wouldn’t do it past Thanksgiving. It’s just too cold and you could risk shocking the bulb and killing it. They need a few weeks to climatize and adjust to the changing temperature.
Most Bulbs Need to Be Planted in the Fall
You can plant in spring starting in March, but you may or may not get blooms out of the bulb even if they sprout.
Bulbs need to winter over because the cold weather changing to warmer weather (sunlight) triggers the bulb telling it not just to grow – it will grow no matter what – but to bloom. More often than not, spring planting misses that bloom trigger.
Fertilizer
You don’t need to fertilize when you plant in the fall. The bulb is not really going to be active then, and the soil is so sandy, most of the nutrients will not be absorbed anyway.
Unless you are using a high grade organic fertilizer, then definitely fertilize in the fall, it won’t hurt.
There are specific nutrients in fertilizers that do different things. You’ve probably seen the three numbers on a bag of fertilizer. They are the nutrients N-P-K, Nitrogen, Phosphorus, and Potassium.
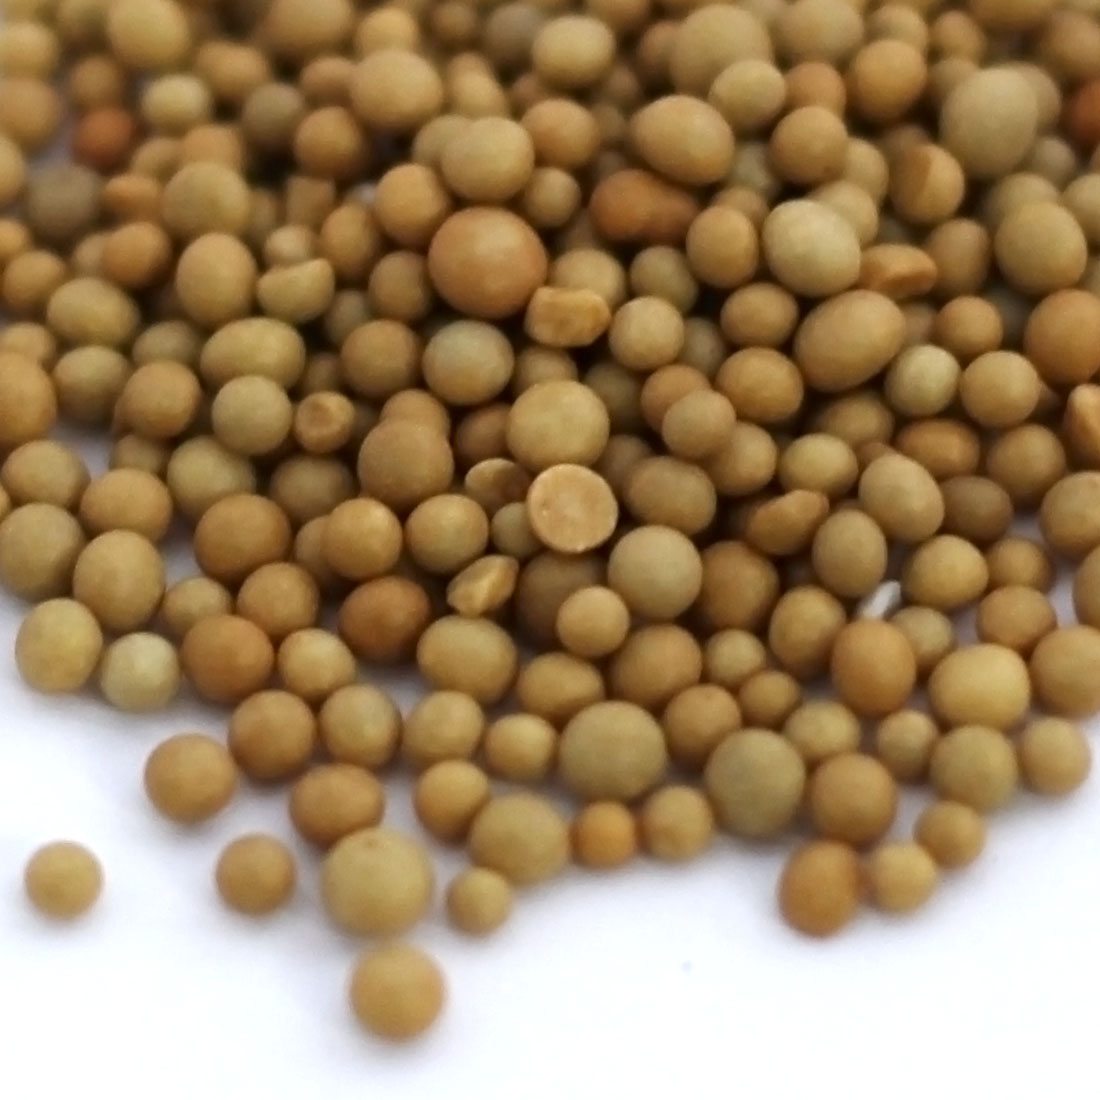
Osmocote Flower Fertilizer Pellets
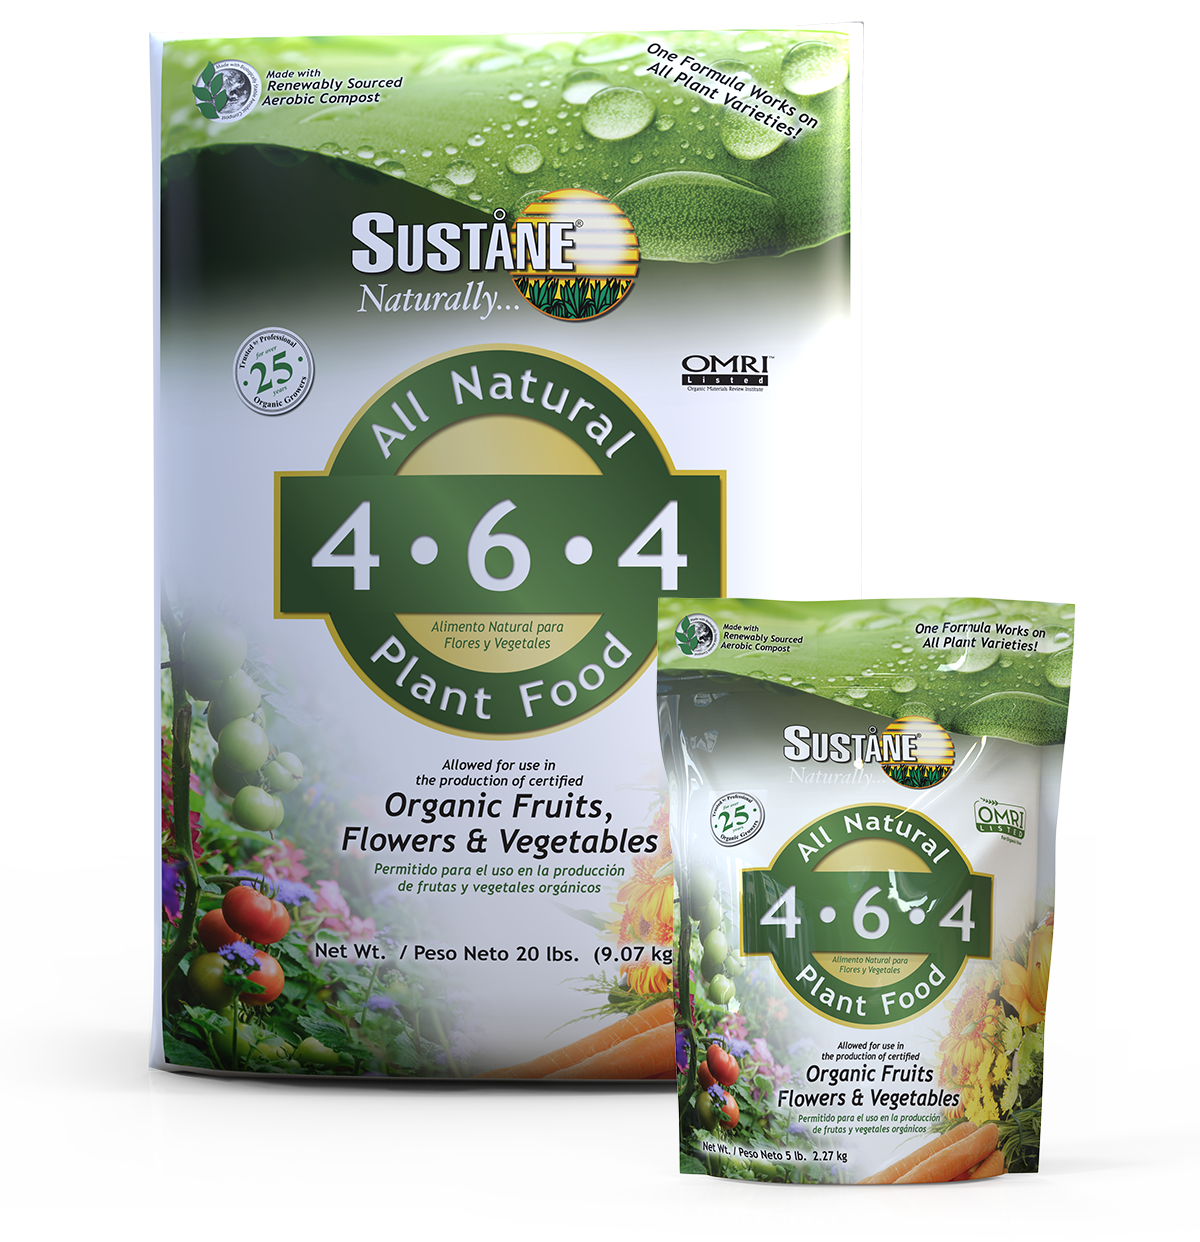
Sustain 4-6-4 organic fertilizer
For flowers, it is very important that you use a fertilizer that has very low or no nitrogen (up to 4 or so is acceptable). Nitrogen does nothing for flowering perennials, except risk damage to the plant because it forces the plant to grow at an unnaturally quick rate. No nitrogen is best.
The main nutrient you want is Phosphorus. Phosphorus is what triggers bloom development and root stimulation.
The second nutrient you want is potassium, which is for plant viability and health, sort of like an immune / resilience booster.
So a 0-7-7 or a 0-10-10 are the most ideal types of fertilizers you want to be looking for (or something in that range). And of course, organic fertilizers are always best. Even though its convenient to get the granule shaker at the check out line, in Home Depot, you’re way better off actually amending your soil with an organic option instead.
Use High Quality Organic Fertilizer with Low Nitrogen
So a 0-7-7 or a 0-10-10 are the most ideal types of fertilizers you want to be looking for (or something in that range). And of course, organic fertilizers are always best. Even though its convenient to get the granule shaker at the check out line, in Home Depot, you’re way better off actually amending your soil with an organic option instead.
Deer Resistance
In order to put your mind at ease, all the recommendations in this article are, generally, deer resistant.*
*Deer resistance assumes that deer have properly read all memo’s concerning the plant’s unsavory flavor and would therefore avoid such material as planted in your yard.
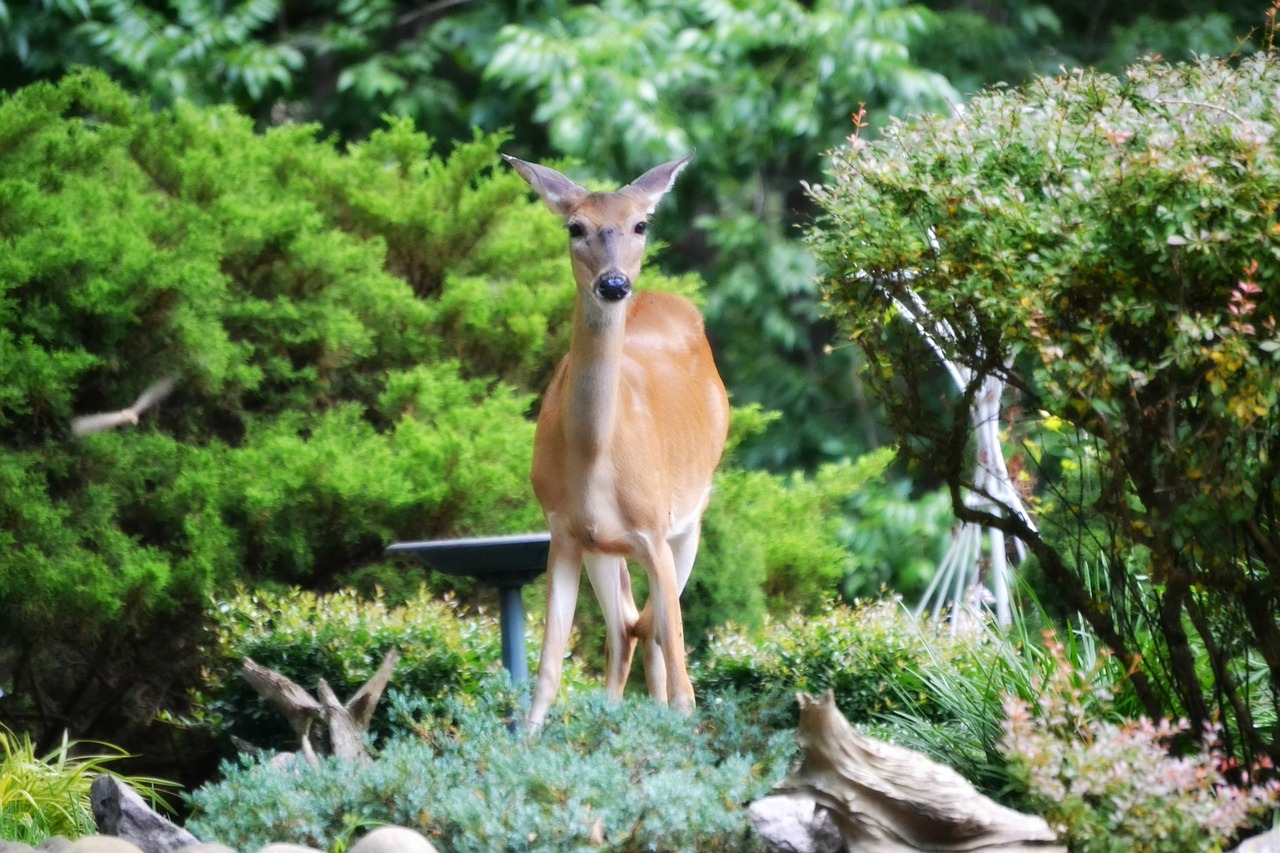
Deer in Your Garden
That being said, all plants are only as resistant as the deer’s stomach is to munching them, but I have had good luck with these in the past.

DeWalt 20v Cordless Drill
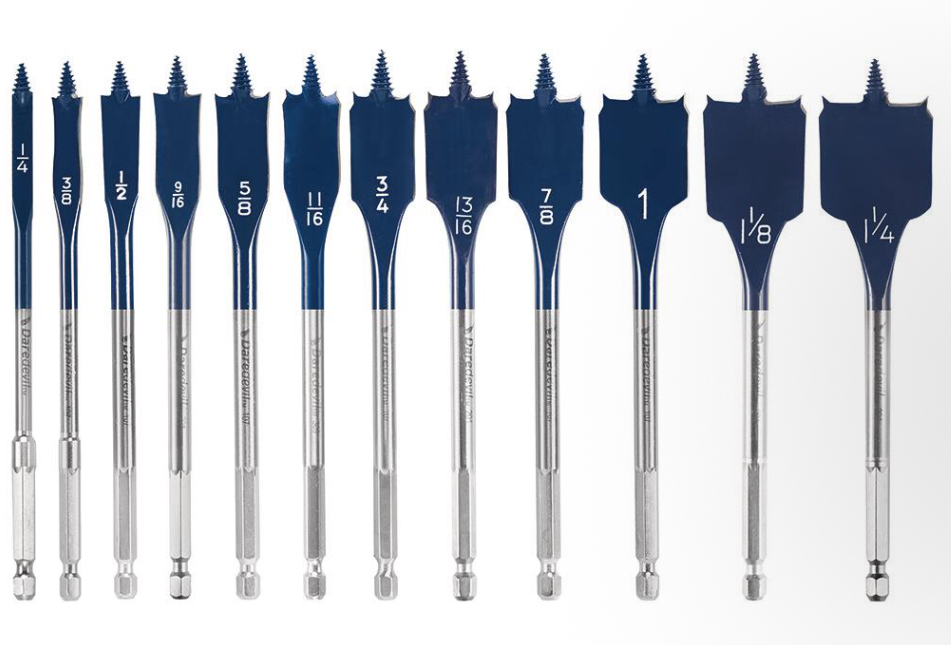
Spade Drill Bits
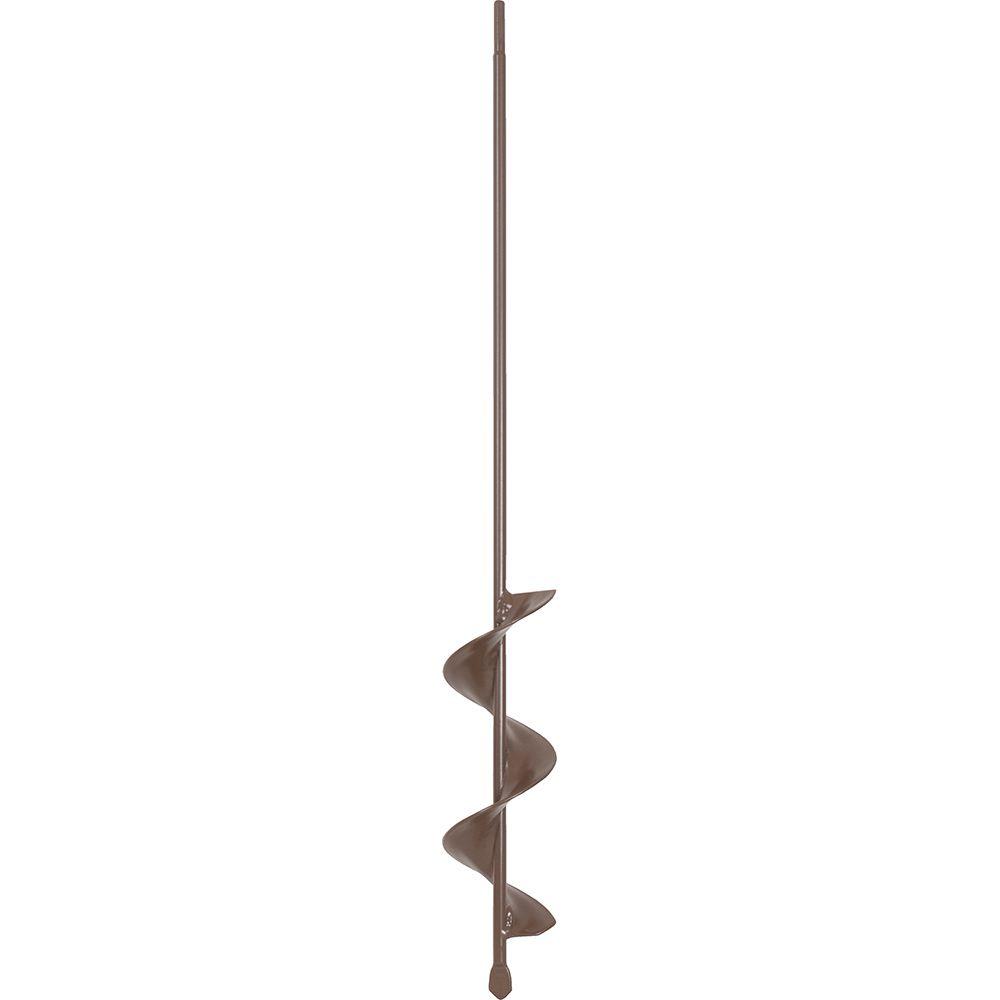
Planting Auger
#1 Best Tip Ever For Planting Lots of Bulbs In No Time
I shared this tip in a previous article, but it needs to be repeated and expanded here.
This is the modern era. If your wrists are sore just thinking about chiseling away at the Central Oregon soil, I have great news for you! Just about everyone has one of these lying around your home.
You may not have one of these, it’s a spade drill bit. You can easily pic up a cheap set at Harbor Freight or Home Depot. Emphasis on CHEAP. You won’t be reusing these bits on any wood drilling projects, in fact, you might burn through 1 or 2 just planting your bulbs.
Planting Augers
You can also buy fancy planting augers that do essentially the same thing.
I tend not to favor them unless I know I am digging in good loose soil. They are great for planting your petunias, but not so good for bulbs, especially if you are plugging a lawn.
The main advantage is the size of hole that is makes.
The disadvantages are: Speed and Torque. You have to operate this on low speed, which means you are running on high torque on your drill. So if the bit binds, say goodbye to your wrists.
For bulb planting, the spade bit is preferable because you can run it at high speed, you only need a few inches of depth, and the bit is designed to rip through tough material.
This is the fastest, easiest way to plant bulbs. Just pick up a couple inch and a half spade bits from harbor freight and you’re all set. If you need a bigger hole, get a larger bit, or drill two holes side by side.
I’ve plugged hundreds of holes in 30 minutes or less and had all my planting done in an hour. Almost – I said almost – took the fun out of it!
The Gardener’s Secret Weapon: Mycorrhizae
No matter what you’re planting, if you really want your plant to go nuts, and grow like a rock star then this is what you need to do: include mycorrhizae (pronounced “my-kor-eye-zah”) in your planting hole.
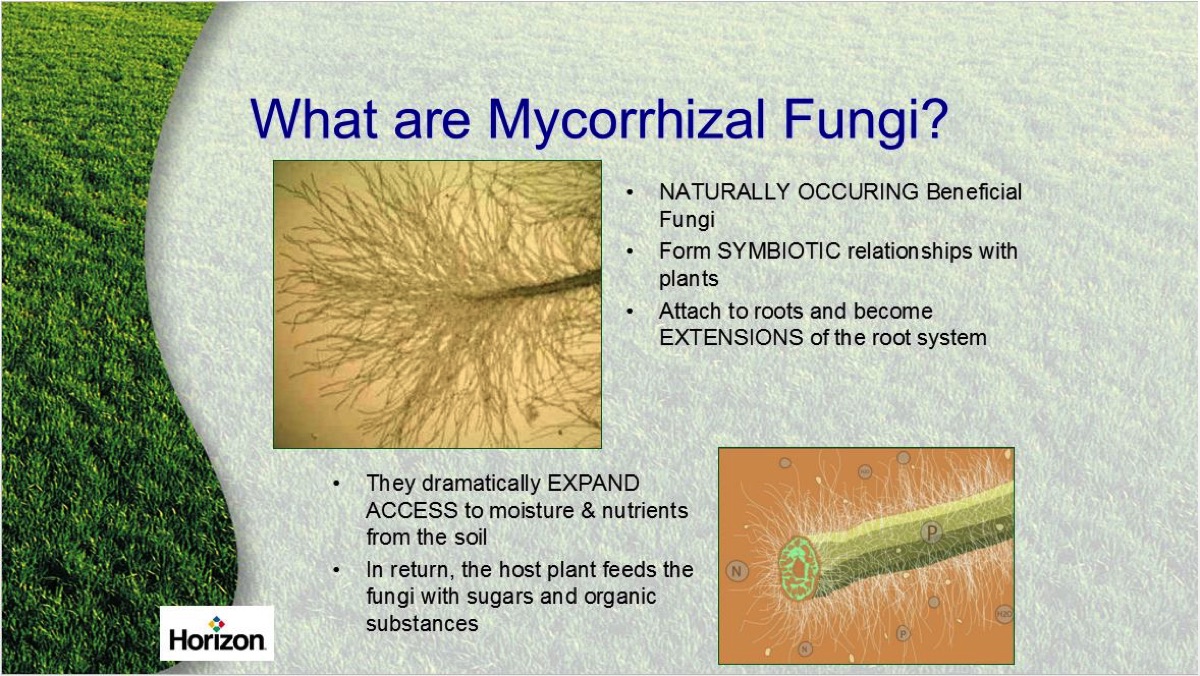
Mycorrhizal Fungi – Infographic by Horizon
You usually can’t find this at a box store. You’ll need to go to a landscape supply store like Horizon Distributors in Bend, or a high end / specialty grow store to pick it up. It’s a bit expensive, but its worth it.
I’m not going into all the details about it in this article. I’m just going to tell you what it does and how to apply it.
Mycorrhizae is a naturally occurring fungus that grows in the soil and attaches to the roots of a plant. It forms a symbiotic (mutually beneficial) relationship with the plant.
Above is an infographic from Horizon Distributors briefly demonstrating how it works. You can read more about it from this article they wrote about it.
You can buy small packets from Horizon which I think is best for flower bulbs rather than buying a big bag. The packets are meant for planting large trees, so they are great for sprinkling over your bulbs.
I’d probably figure about 1 packet per 50 bulbs, give or take a few.
Once your holes are plugged and the bulbs dropped inside, before you cover your holes, tear open a packet and sprinkle a small amount of the contents inside each hole, like you were salting a piece of corn on the cob, just a small amount, a pinch of mycorrhizal fairy dust.
If you are using an organic fertilizer, add that now too.
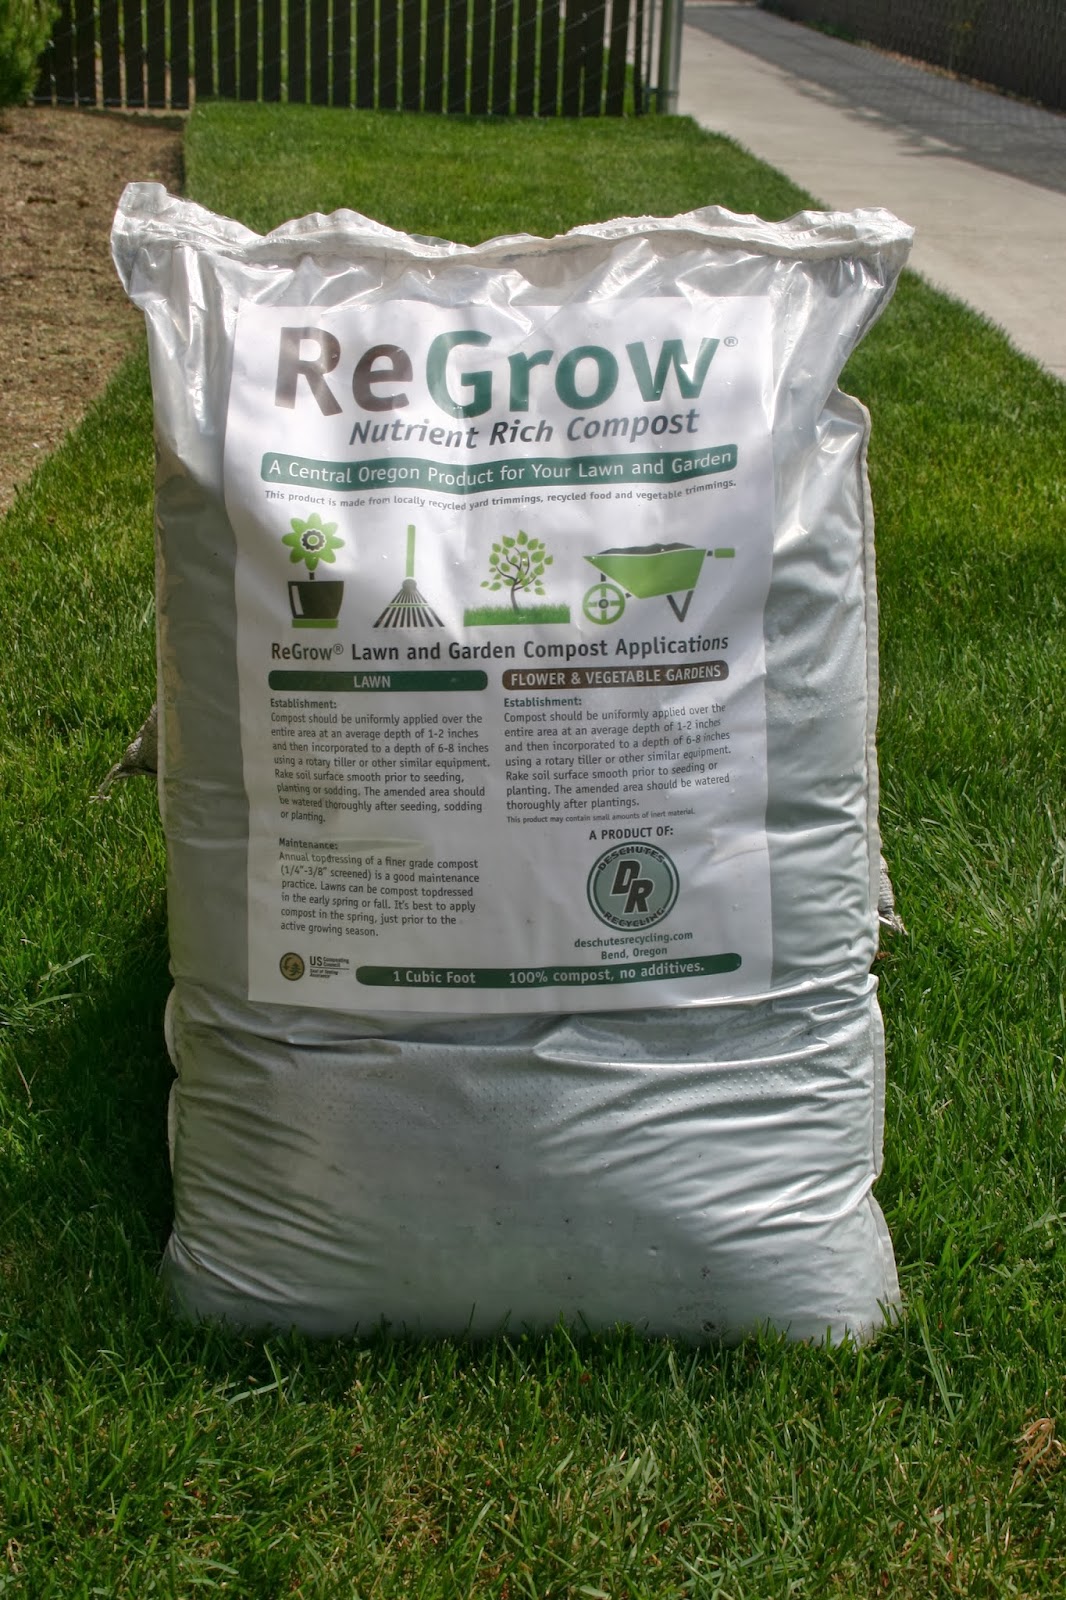
Deschutes Recycling ReGrow Compost
Use Compost, Not Native Soil
I recommend grabbing a couple bags of the biofine compost from Deschutes Recycling at the Knott Landfill. Its great stuff. Use that rather than the native soil to cover over your bulbs.
We are going for best results here, right? You know, the ones that make your neighbors gawk every time they walk past your place to the mailbox, right?
Using compost is a crucial step in planting because it is juiced with tons of beneficial fungus and bacteria.
Those two elements are critical for planting in Central Oregon because the native soil is basically sterile – very low organic content.
Using compost to fill in all those tiny holes will work magic for your bulbs (and your lawn if you are plugging them there).
Compost and Mycorrhizae Will Work Magic in Your Plantings.
Finish Your Planting
The last step, and very important especially if you are using mycorrhizae, is lightly water in your bulbs. This helps activate the mycorrhizae and works the compost in and around the bulb making it snug and cozy for winter.
You may need to apply more compost over your holes as the water will pack it in. That’s it, you’re done!
7 Spectacular Fall Planted Flower Bulbs For Spring Blooming Fireworks
+ 1 Bonus Flower that Will Completely Surprise You!
I’m organizing this list in order of my personal favorites. Sadly, the tulip just isn’t on my list because tulips are like candy to the deer in Bend. They will drag their greedy little tongues over two miles of broken glass just to munch your tulips right before they bloom.
So my advice if you want tulips is: build a 10 foot tall concrete wall around your planter, top it with razor wire, and post 24 hr security guards to walk the perimeter. Even that might not be enough.
Best Place to Purchase Flower Bulbs
My personal favorite place to get bulbs is from edenbrothers.com. They are a large grower out of California. Not only are their prices great, but their stock ships fast and minimizes stress to the plant. Plus they carry a huge selection of bulbs that are cold hardy for our extreme planting zone.
It’s tempting to get bulbs from those giant bins at Costco or Wal-Mart, but normally, the quality of the stock isn’t as good and the value just isn’t there.
Plant Hardiness
If you look on a USDA hardiness zone map, you will see that Bend is situated in what they would consider a zone 5.
While I have had great success with zone 5 plants thriving in our area, for best results, I usually go down to zone three, especially if you find yourself on the west side of Bend, or further south into Sunriver and La Pine.
All the items I recommend below will grow in our area (because I’ve grown them myself). Assume they are zone three, if they are less hardy, I will note it in the description.
#1 Crocus
Sure, let’s start with the best one first.
Love, Love, Love this bright little flower! I selected this as my number one because crocus is among the first flower to bloom in spring, it is the cheapest and easiest to plant, and it multiplies like crazy! Sometimes it can easily triple from one season to the next.
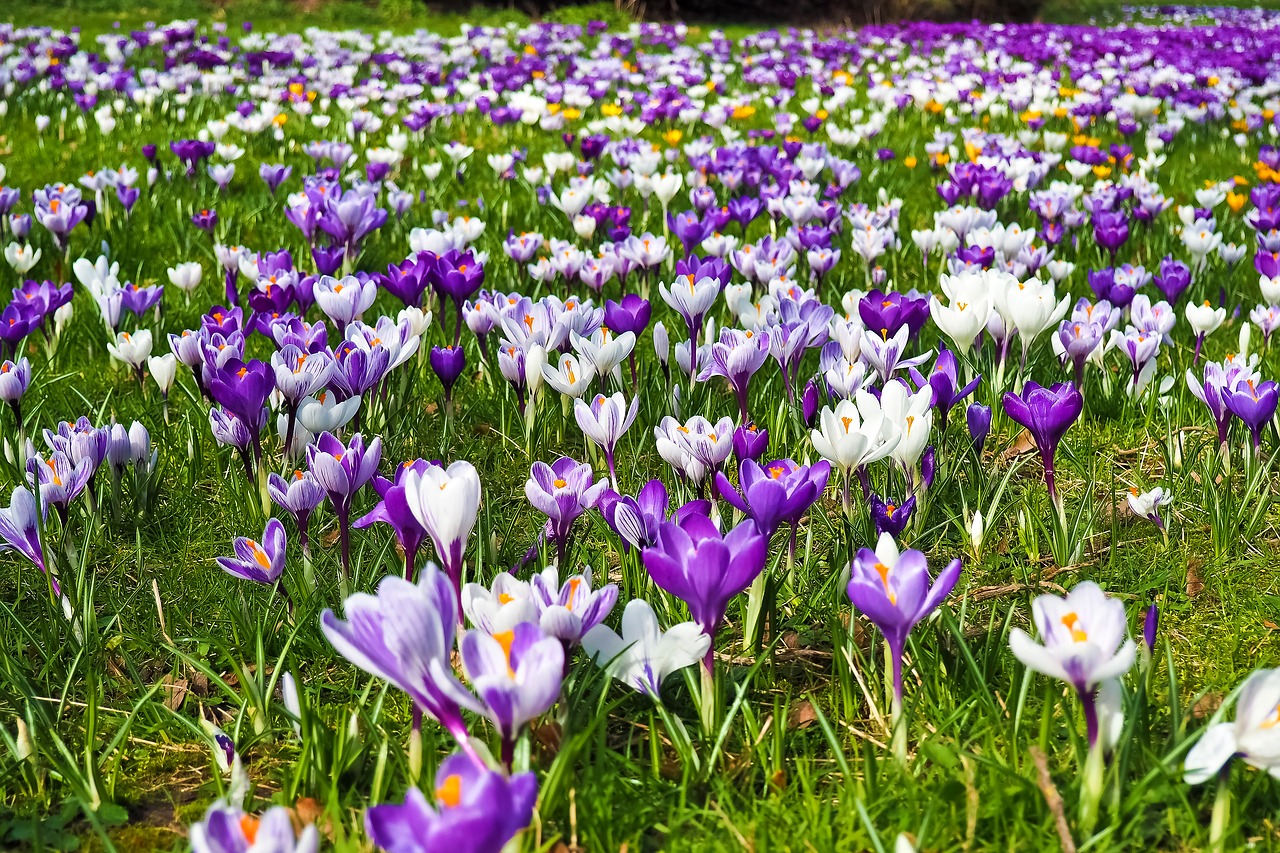
Crocus in a Lawn
Colors
Crocus bulbs are tiny, and they are a very short variety of plant, only growing 2-3 inches in height, and come in a narrow variety of colors such as white, purple, purple/white, and yellow.
Bloom Time
Expect to notice blooms in late February through the middle of March.
How to Plant
You’ll want to plant these about 3 inches apart and 2 inches deep, and they are best planted in groups. I like to cluster them in groups of 50 or so and at 35 cents a piece, I can afford to make several groups around the yard.
Keep in mind that these are a ground cover specimen, so even though you are planting them 3 inches apart, your first season of color may seem a little sparse, but that is because we are making space for the bulbs to multiply. In a year or two, the patch you planted is going to fill in with dense, prolific blooms that will make your neighbors do a double take every time they drive by your place.
Crocus also prefers areas of full sun, although they will also tolerate some shade.
Planting Patterns or Locations
My favorite place to plant crocus is throughout the lawn, usually on a corner or along a pathway. I like utilizing the lawn for bulb planting because my flowerbed space is such a premium for my spring and summer perennials.
They also make excellent tree ring fillers. Nothing looks brighter than a crabapple tree still bare from winter with a bright ring of purple crocus blooming underneath.
If you are plugging them in your lawn, you can easily use a tape measure to create neat rows of bulbs in any section of your lawn you want to show off next spring.
If you are planning to work in other bulbs with the crocus, try planting in U-shape or 0val-shape, leaving the center open for taller plants.
You can get away planting these in your lawn because they will have had enough time to bloom and photosynthesize and store energy for the next season, that they can just be mowed up with the first cutting of your lawn.
If you aerate your lawn, you may run the risk of hitting a few bulbs with the aerator. I wouldn’t worry about that because they are so prolific and multiply so quickly that you won’t notice anything missing in the next growing season.
#2 Grape Hyacinth
Wow! Just look at that picture! Who wouldn’t want that somewhere in their yard?
OK, ok, maybe that’s a bit over the top, but you can still achieve great effects using this as a border plant and ground cover.
This plant comes in at about 9 inches tall making it a good mid-range height, between crocus and daffodil or tulip in height.
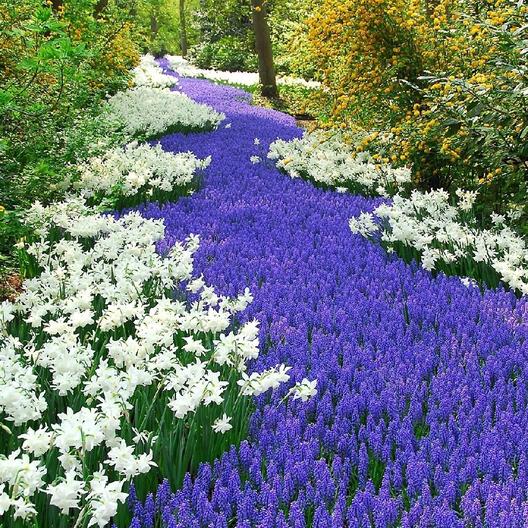
A Purple River of Grape Hyacinth
Colors
This plant only comes in purple.
Bloom Time
These are a spring bloomer. They will come on after your crocus.
How to Plant
Make sure you plant them with the pointed end facing up in your hole, three inches deep. These guys need more space with a recommended density of 10 bulbs per square foot.
Planting Patterns or Locations
These are best planted in rows as a border plant. If you have contoured flower beds, such as berms and mounds, consider planting these in the valleys following your mound or contour lines for a curving dramatic effect.
Use a tape measure to mark out a 1-2 foot wide space. Try varying the width of your space to produce a really cool water flow effect with your bulbs.
These are best not used in your lawn the crocus. After they bloom, the foliage needs to be left up for some time so the plant can store energy in the bulb for the next season and multiply.
Use pruners to cut the old foliage off when it begins to wilt in late spring / early summer.
#3 Siberian Iris
This is actually a summer blooming tuber flower. Alright, you caught me, you’re wondering why this is included in a list of spring flowering bulbs.
Well, I had to include it because it is such a beautiful plant and it has to be planted in the fall just like a normal spring plant.
As a general rule, I am not a fan of Iris. You wont find it in my yard anywhere, except for this. I make an exception
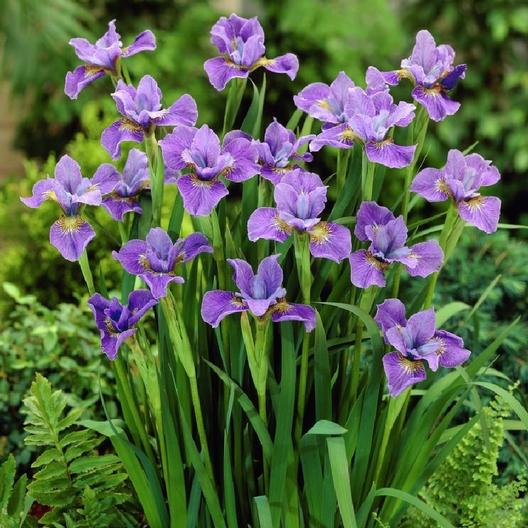
Siberian Iris
because the foliage on this plant reminds me of Chinese Jade (like the mineral, not a plant).
It’s a beautiful, slender, sleek, and tall leaf, and for about 1 month out of the year, displays stunning purple blooms. After the blooms are spent, the foliage remains and resembles many ornamental grass varieties.
Colors
This plant only comes in purple.
Bloom Time
Typically the Siberian Iris is a mid-summer bloomer.
How to Plant
You’ll need a sizable hole for this bulb as it prefers to be planted 4-5 inches deep.
Planting Patterns or Locations
This is a feature specimen plant that grows about 24-36 inches tall on more mature varieties.
Plant it somewhere in full sun with a good compost to keep the roots cool and moist during the hot dry summer.
#4 Anemone Blanda Mix
So far we have a lot of purple we have been looking at, so what I really like about the Blanda mix is its ability to come in a 3 color combination of white, pink, and blue.
This plant is also more dense than most bulbs, which tend to be fairly scant with a large feature flower.
The anemone, which it certainly has graceful flowers, is definitely more of a foliage feature plant.
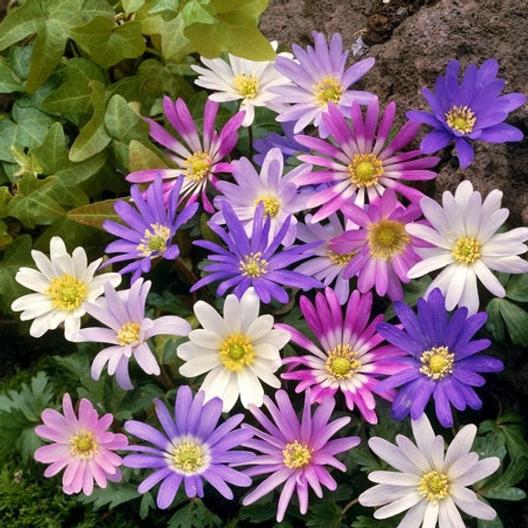
Anemoney – Blanda Mix
I also like the shape of the flower as they bear a more “daisy” shaped pattern with long thin petals around a yellow center.
Colors
White, Pink, and Blue mix.
Bloom Time
This is a late spring bloomer. Look for blossoms in the beginning of April, the same time as the tulips you were hoping wouldn’t be chomped by the deer would have come up.
How to Plant
Plant the anemone bulbs 4-5 inches deep and are more tolerant of shade than other bulb varieties, but still provide ample sun through some portion of the day.
These are a taller ground cover or border variety. Plant in areas that are open and need a thick mat of foliage to grace the ground with while also providing a friendly pop of color.
Try planting behind a crocus ring for a great continuous blooming effect from early to mid spring.
#5 Daffodils – King Alfred Variety
The Daffodil is the wedded mate to the crocus. You really can’t have one without the other.
In fact, while I’m writing this, I’m wondering why I accidentally put the daffodil all the way down here…
Colors
Most common is a bright yellow, although there are many other varieties that come in white, orange, color blends, shapes, and heights.
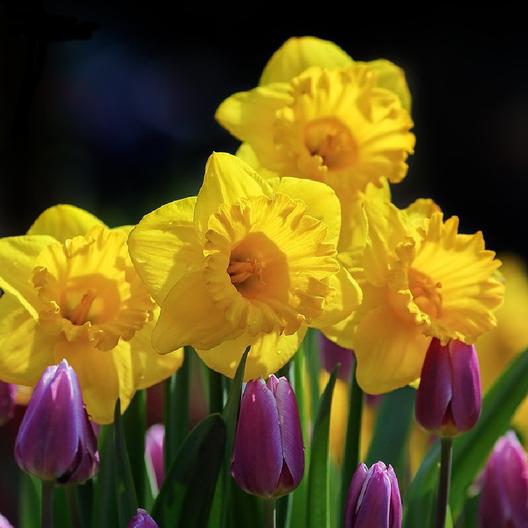
King Alfred Daffodil Rising Above Purple Tulips
Bloom Time
Daffodils commonly bloom early to mid-spring.
How to Plant
Simple and straight forward, make holes about 5 inches deep and 4 inches apart.
Plant them in clusters of 10-15 for bright pops of color all around your yard.
Planting Patterns or Locations
So, like I said, these are the wedded mate to crocus, so if you have create the U shape or 0val shaped ring of crocus, put daffodils in the center. Not only will their bloom time overlap, but the height contrast looks great with the short crocus in front and the taller daffodil in the center.
Daffodils prefer full sun and really can’t tolerate constantly wet soil, so make sure they aren’t somewhere where water stands and collects – which really shouldn’t be a problem for most places in Bend.
#6 Papaver Orientale (Root)
This is on my list because it is really unique and the colors are a shear break from the normal spring colors you see around the place.
They are actually a type of poppy that is planted in the fall. My personal favorite color is the Burgundy.
When your normal spring mix is done blooming end of April, these guys will take over the show in May.
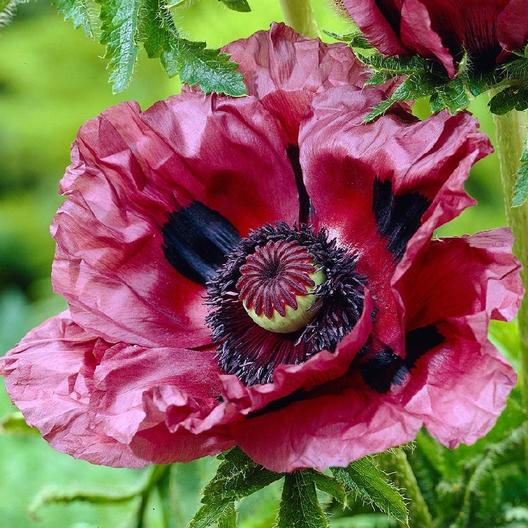
Papaver Orientale – Burgundy
Colors
White, red, pink, salmon, burgundy, orange.
Bloom Time
Late spring, early summer.
How to Plant
Make sure you select an open, sunny area to plant these roots.
These are a root stock item. They aren’t bulbs like the others on the list. You will get a 10 inch carrot like root and it is essential that you dig an adequate sized hole to accommodate the root as shallow planting is the leading cause of planting failure.
Composting and the use of mycorrhizae is essential when planting these. The root will actually establish itself late fall and early winter, so give them a good soak after planting. They need the compost to add a little extra heat and microbe activity in the soil to help get established.
Once they start growing in the spring, look out! These guys will get quite large.
#7 Allium – Giant Mix
These guys are show stoppers, especially after they’ve had a year or two to establish themselves.
Treat them like royalty because they are truly regal plants.
Alliums are bridge plants. They tend to bloom in the gap between spring flowers and most summer flowers like your daisies and black eye susans.
You need to put a little extra work into protecting these though. They are a zone 4 plant, which puts them on the edge for our area. I recommend keeping them close to the house on a sunny wall that will reflect and absorb a lot of heat through the day to keep them snug and cozy during the long winter.
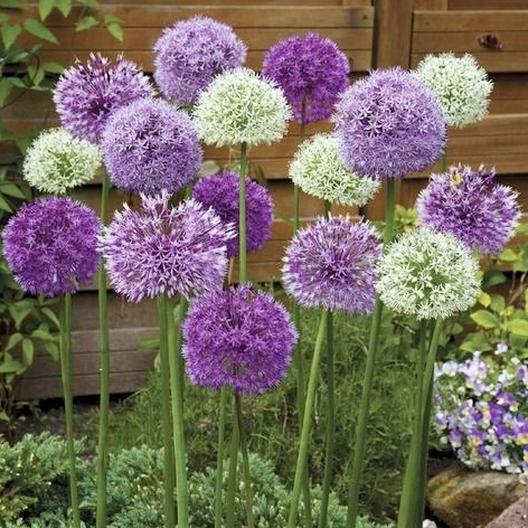
Allium – Giant Mix
Colors
White, purple, blue.
Bloom Time
Early summer. Sorry, no spring glory here, but when summer hits, so will the grapefruit sized flower cluster globes from these magnificent plants.
How to Plant
Plant 6 inches deep and 6 inches apart in large circular groups of about 15 bulbs.
Make sure you plant the pointed end of the bulb facing up in your hole, and make sure you use a good fertilizer, compost, and mycorrhizae to coddle these babies until spring.
Planting Patterns or Locations
Again, plant them along a south facing, full sun bed near a wall or stone path. You want to look for a site that will get reflected winter sun to help keep the soil from getting too cold or freezing down too deep.
Make sure you water these bulbs in after you plant them.
Be mindful of your location because these flowers will easily reach heights of 3 feet or more when mature.
And Now for the Bonus, Surprise Bulb Reveal that You Simply Have to Try…
Saffron Crocus – Crocus sativus!!!
I could not believe it when I tried this a few years ago. I thought there was no way I could get this to work, but was blown away when plucked my first threads of home grown saffron right here in Bend at my house behind Worthy Brewing.
I’m a foodie in addition to a yardie, so whenever I’m able to blend the two together, I do it!
Better than all the herbs I’ve grown, peppers, tomatoes, fruits, etc. this takes the cake of the most amazing thing I’ve ever planted.
Fresh saffron is unbelievably good, much better than anything you can buy from the store, and the sweetest thing was, I had more than I knew what to do with.
My first season, I planted 100 bulbs and the zone hardiness rating was 6! I thought, “There’s no way this is going to work.”
But sure enough it did, and within two years, I had well over 500 bulbs blooming in the tiny patch of flowerbed behind my house. There were so many I had to dig them up and give them away to my friends (that’s how I know there were 500+, just incase you were wondering  )
)
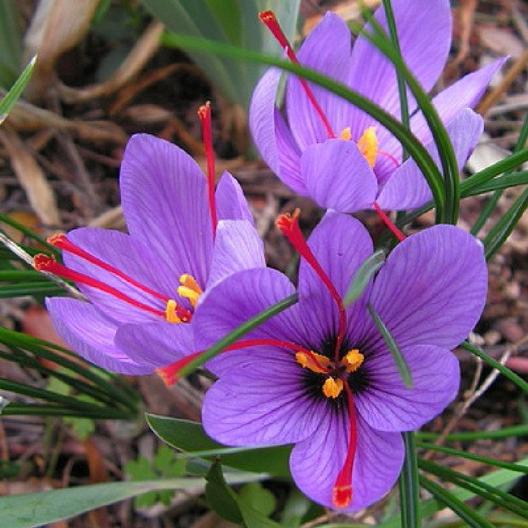
Saffron Crocus
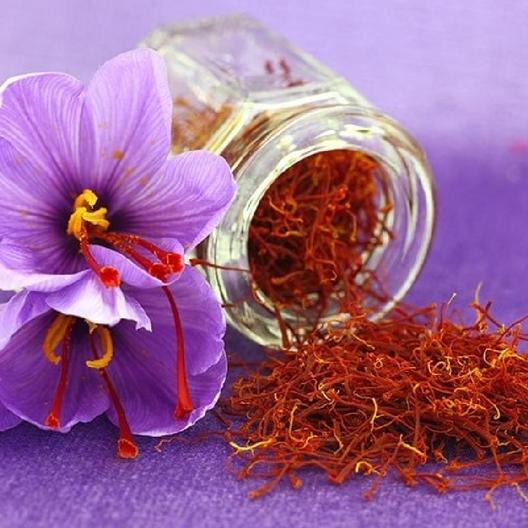
Saffron Stigmas (Spice)
Saffron crocus is different from the other crocus you typically see. Most crocus blooms in the spring, but saffron blooms early fall. So you will be planting these now and waiting almost an entire year before seeing any sprouts or blooms.
Colors
Purple.
Bloom Time
Late summer, early fall.
How to Plant
Planting is critical for success. If you like food, or even if you’ve never had saffron before, once you use this, you’ll neve make food without it again. It has that much impact on the flavor of your dishes and all you need are about 6 tiny threads.
Plant these guys just a tad deeper than normal crocus. Go down a good 5-6 inches and space them about 3 inches apart. They don’t mind growing densely together.
You’ll want to make sure you use a great organic fertilizer, but steer away from chicken composts.
You’ll also want to amend your soil so that it has a good loamy texture with good drainage. Use some peat moss and compost to do this.
Saffron crocus is dormant through the summer. So select an area that is not getting soaked every day from your irrigation system or the water will make the bulbs rot. A little moisture is fine, just not standing wet.
Because they are a zone 6 bulb, location really matters. Most sites recommend pulling the bulbs every fall after the blooms have spent.
I didn’t do this.
Instead, I planted the bulbs right up against the foundation of my home on a south facing wall – making use of all that reflected heat from the winter sun.
My bulbs went through the 2015 blizzard, you know, the one where there were 6 feet of snow on all the streets in Bend and it was absolute hell? They went through that and pull out just fine next fall.
Harvesting Saffron
The saffron spice is actually from the 3 orangey-red stigmas in the center of each flower. To harvest, cut the flower from the plant immediately after the flower opens and/or all signs of morning dew have dried off.
Stigmas can also be pulled directly from the flower. Lay flowers in a working area away from a breeze and use small scissors or tweezers to take the 3 stigmas off of each flower.
Once collected, these stigmas can be dried, but be sure not to expose them to high heat. Put them in a food dehydrator on the lowest setting, or on a screen in a warm, dry area. Store saffron in an airtight container and it will usually hold its flavor for about two years.
Use for cooking – try it in everything. Normally you would find it in Thai or Indian styled dishes. It goes great in rice and stirfrys. Try it there and get used to the flavor and the quantity of threads you need before you start experimenting in other dishes like pasta sauce.
That’s a Wrap!
I completely poured out 15 years of experience into this article. I hope this is a huge help to you with your planting dreams and enables you to love your yard. Thanks for reading!
Need Flower Beds for All Those Bulbs You Want to Plant?
We Can Help.